Tuesday, November 26, 2013

11/25/2013 What next?


11/25/2013

The big news from "The Farm With a View" is we have been given our occupancy permit from our local building inspector.  The visit went very well, and we were more than pleased by all his compliments on our work and craftsmanship.  That made so many of those late nights and long weekends feel much more worth it.  We now are in the process of not only continuing to work on it, but are moving household goods in while trying to clean out the old house. 

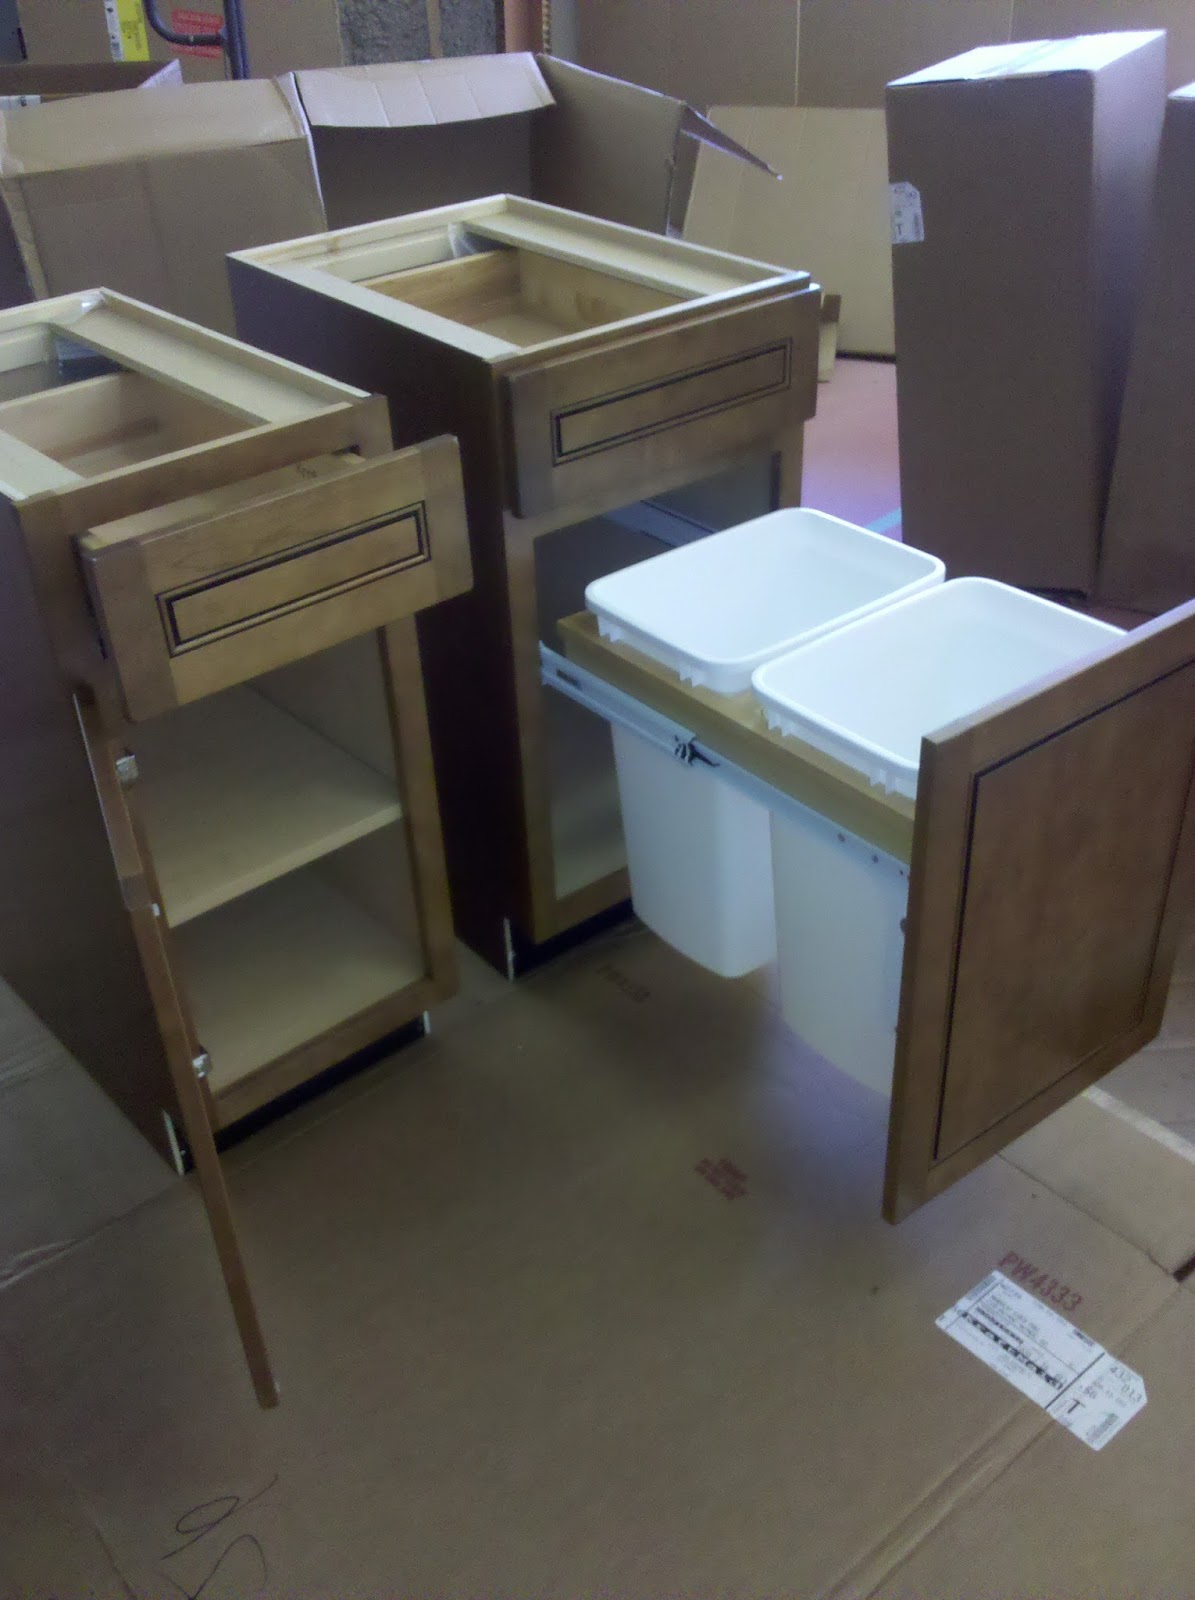
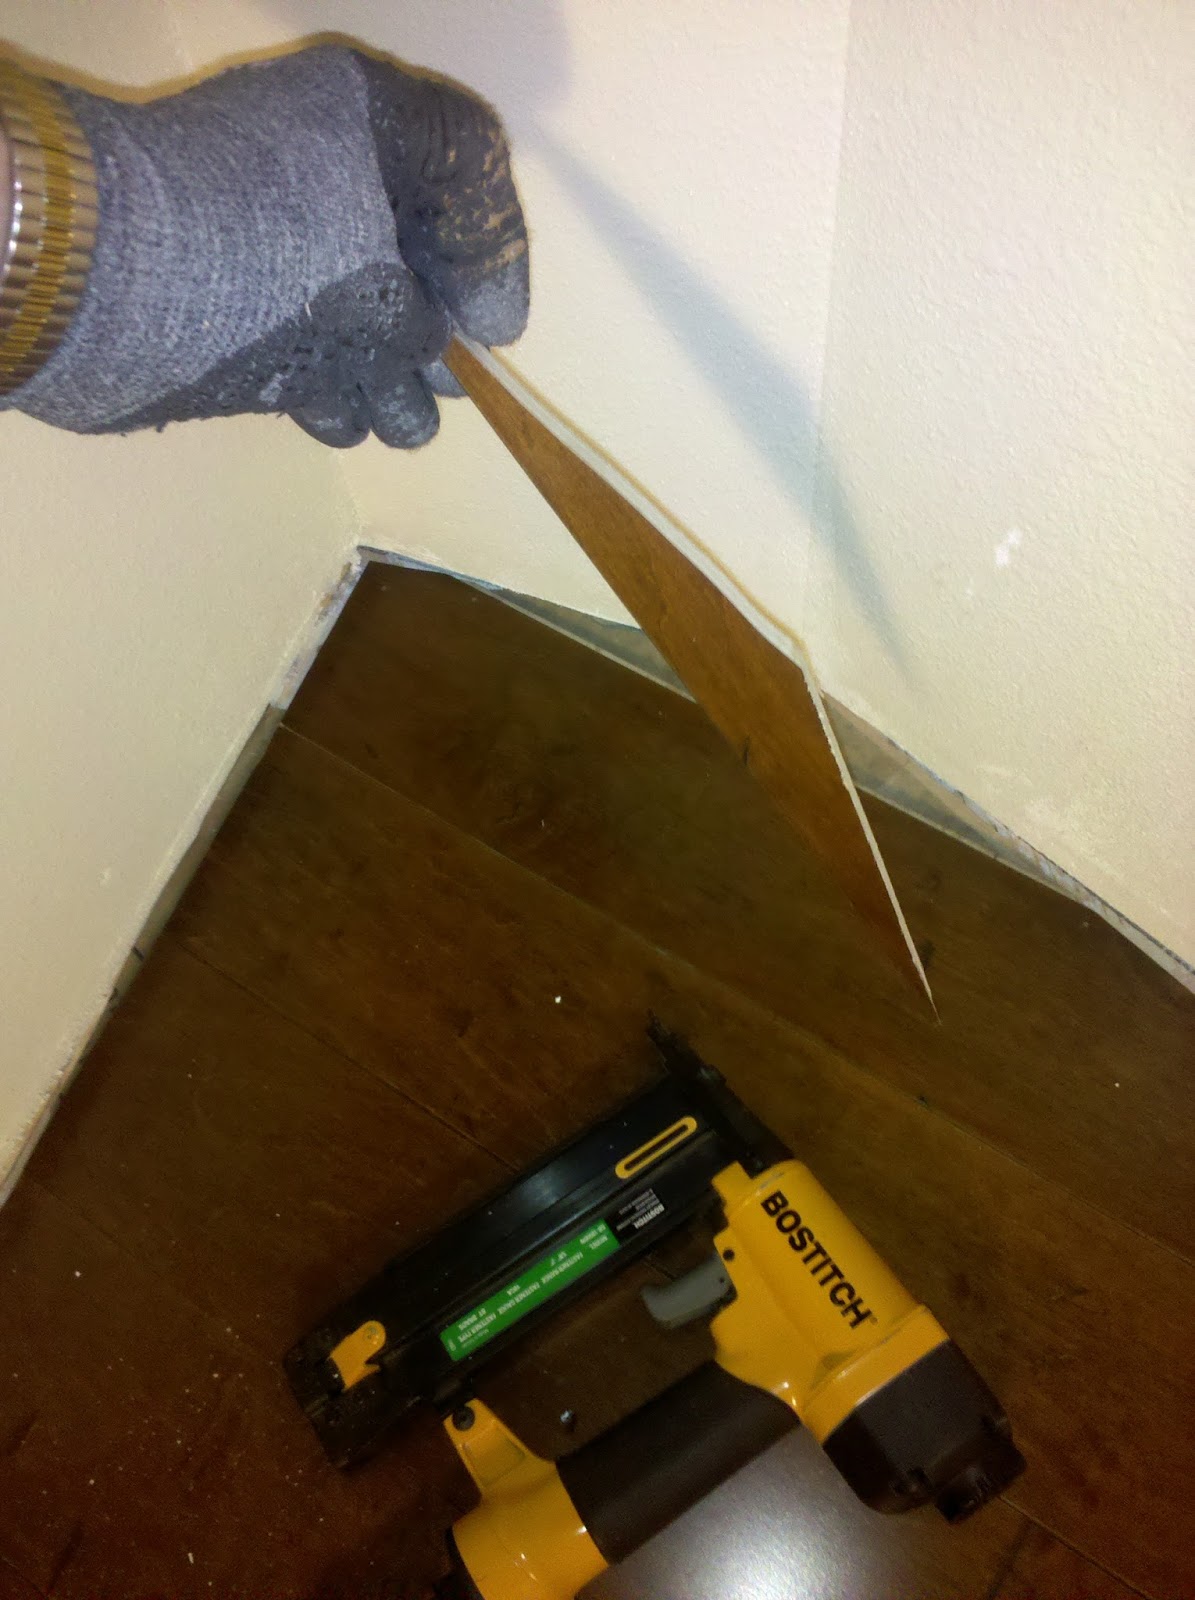
Sometimes I think the main purpose for building our own house is to serve as an example to others, how many things can possibly go wrong.  Previously I mentioned how as we were about to hang our microwave/range hood, we discovered that HVAC had mounted the vent duct too low in the wall.  After a little work, we opened the wall, corrected the too short duct, and sealed everything back up.  Last night we went to finish the installation.  Wall patched, holes drilled, brackets mounted, and finally appliance neatly hung in place.  It was beautiful.  I had even set the clock to the correct time.  Then I opened the door........or at least that was what I tried to do.  It only opened about 4 inches before it contacted the cabinet frame, where it stopped.  Yup, our cabinets were designed to make the microwave look built in, with panels that went down the full length of both sides.  It looked so built in that there was no room for the door to swing.  So, back to square one with removing the bolts, dropping the appliance back down and removing it from its frame.  After a short brainstorming session, we went back and made the appropriate marks, and with the help of one of my Dozuki saws and a straight edge, cut down the offending panel.  A small piece of trim matched perfectly with the newly sawn edge, plus a little stain to blend, and we went for attempt three.  This time it was a success, and the results are gorgeous.  Unless we confess as to the modification (which I believe is what I just did), you would not be able to tell the cabinets were not designed this way on purpose.

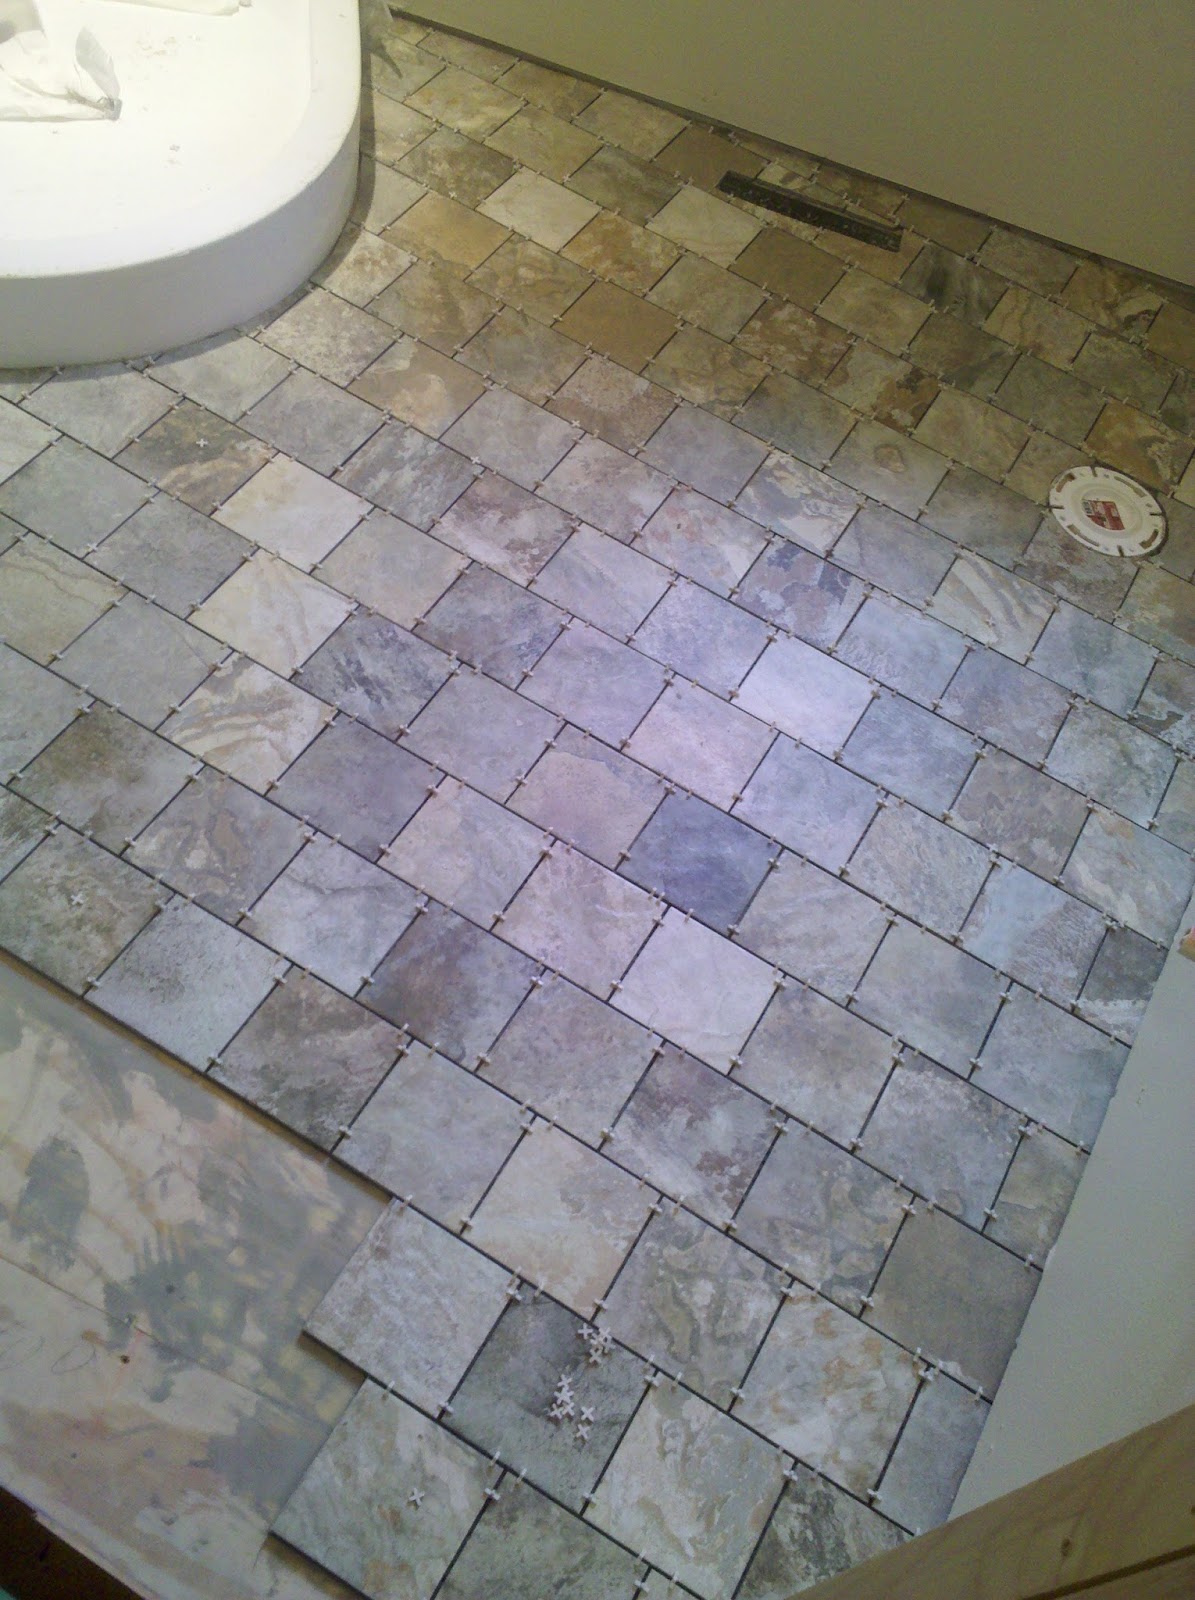
On to the finishing touch for our night.  The only spaces in the house that we were going to carpet were our walk-in closet, and the stairs going to the basement.  We decided at the last minute to also carpet the small (8X12ish) entry leading from the base of the stairs into the main basement.  Off this little entry area is the door to our cold storage room (also known as "the storm bunker").  Since the carpet was now going to run right up to this entrance, we decided we had better install the door before the carpet layers came the next morning.  What should have been a thirty minute job went two hours.  The contractor that did our rough work made the opening too tall, too wide, and slightly out of square, requiring us to build a new header and work much harder at installing than it should have been.  Imagine our consternation when the carpet layer arrived today and very nicely suggested we remove the door and redo it, only 3/8 inch higher.  His reasoning was sound because the exterior grade door leading into the room had a very low flat sill, and the carpet would have been higher and left a natural channel for dirt and debris to gather.  Since we want everything to be right and not cause us to have regrets later, we will be removing and starting over with the door this week.  The carpet layer will be back at a later date when we finish with the door and some trim that we need to finish around the stairs.

The end result after many many hours.

Here is the area we had to cut away and modify.

Tuesday, November 19, 2013

11/19/2013 More tile

11/19/2013

I think if I had a choice, (and only if there are no timeline pressures) I would much rather tile than paint.  We're finally down to the last portion of the house that needs tile, and we saved the biggest for last.  We (Debra?) decided in the 11th hour that our master bath would look better with the walls around the tub tiled all the way up to the window, and on three walls instead of just the back splash border we had originally planned on.  I resisted as much as I thought was safe, but ultimately gave in to some one who obviously has way more decorating sense than I do.  Now that I see what the finished product is going to look like, I'm very glad I did.  Although she did give me full permission to pick the rest of the bathroom finishes, I know I will never hear the last of some of my choices.;-)  Today I will finish the remaining two walls around the tub and get our access panel cut below the tub, prior to tiling the front.  Not sure if I'll finish all that today or not, but that is the plan.  After that, the biggest project of all, the walk-in shower.

Two  steps forward, one step back.  We were in the process of mounting our microwave/range hood the other day, when we discovered, much to our dismay, that HVAC  had mounted the external vent duct about four inches too low. :-(  The only way to tackle that was to open up the wall, add an extension, and close everything back up again.  Very disappointing, but what can you do?  We tried to think of any work-arounds to it, but in the end knew the only way to do it right was to tear it out and redo it.

Still need to finish two walls to the left and the front of the tub.  Then grout and move on to the the walk-in shower.

Cutting that hole in the kitchen wall (even though it will be hidden behind the microwave/hood) was a painful step.
Still needs grout, but almost complete.

Turned out better than we had hoped.  Am glad Debra overcame my objections on this tile job!

Friday, November 15, 2013

11/15/2013 Ready for inspection

11/15/2013

Well, we are closer, but still a long way to go.  We have what we believe are the necessary steps complete to satisfy the building inspector to let us have an occupancy permit.  With that final step, we can officially move in and start to prep the other house for sale while we continue to work on this one so we can finally close on our loan.  Since my last post we have finished wiring and wrapping the island, finished tiling our entryway, had our under cabinet lighting installed, had a landscaper bring in final fill material, and finished surfacing the fireplace front.  Still to do: Install carpet in the walk-in closet and on the stairs, finish building the shower in the master bath, tile the tub front and wall in the master bath, stain and install all the interior doors, stain and install all interior wood trim, set the mantle, hearth, and wall of stone on the fireplace, attach the faux rock on the outside of the chimney race, and I'm sure I'm forgetting a bunch more.  We're very pleased and proud of all the things we've done on the house to date, but then we look at all the things we still have to do and it brings us back to earth pretty abruptly.


Seven LARGE dump truck loads of fill were brought in and rough sculpted to blend the house into the hillside and to take care of some erosion.  Also three loads of gravel to raise the driveway by the garage for proper drainage and repair some low spots left undone by a previous contractor.  Next Spring we will have some good black dirt brought in for plantings and final landscaping.
Finally closed up the fireplace wall in preparation for all the stone work we are going to do.  That also allowed us to finish attaching the rest of the fireplace parts, to include the door, so now we can safely have a fire in it!  This was the first fire of the year and the first in the new house.  All we had at hand were scrap cardboard and paper, but a fire is a fire when it's ceremonial only.


Final wiring and wrap to complete the Island.  This is officially my favorite place to sit while planning what to work on next. :)


This is the largest format tile we have worked on up to now.  these are 18X18 tiles and require much more care in making sure you have a level and properly prepared floor than the 6X6 and 12X12 tiles in the rest of the house.  Otherwise you are sure to have cracking and shifting somewhere down the road.


Thursday, October 17, 2013

10/17/2013 Kitchen completion

10/17/2013.

Who would think something as simple as flush toilets would feel like winning the lottery?  The plumbing has been fully hooked up, so now we finally have running water, flush toilets, and operational tub and showers. No more dry chem camp toilet and having to shower at work after working on the house.  The last of the counter tops arrived and were installed yesterday morning.  Also we fastened the last kitchen cabinet to the wall as we worked towards another midnight.  It feels like a huge weight has been lifted now that we have that task completed.  We still have some crown molding to attach and the back half of the island to wrap, but all the major players are in place now.

Finally we will have some real counter space to work with.  Our current house has barely 1/4 this much.  We're very excited with this work space.  We love to cook together in the kitchen and this will make that so much easier.

The "scary" wall of cabinets.  This was the most challenging section because everything is on a different level and depth.  This also made the crown molding a most challenging task.  We'll get the microwave/range hood mounted later this week, and we're still waiting for the rest of our door/drawer hardware to arrive too.

The island partially complete and needing the bar section wrapped.  We have to wait until the electrician comes tomorrow to finish wiring it first though.


Wednesday, October 2, 2013

10/2/2013 More Kitchen

10/2/2013

The kitchen has been one of the scariest projects for us thus far.  This is precision work and you can't hide a mistake here like you can on a rough cut deck board, or expanse of cement.  No, this kitchen has been designed down to the 1/16th of an inch, and the margin for error is so minute as to not be worth mentioning.  Couple that with walls and floors that are not level or true and you have the recipe for potential ugliness.  Here's where the attention to detail really pays off.  As is usual, this slows us down more than we would hope, but it must be done.  Our designer, brilliant visionary that she is, has made allowances with some of the trim and design elements included that have saved our bacon several times up to now.  It's not over yet, but we are charging ahead in increments.  

This section darn near killed us.  The top section consisted of three cabinets.  The wine rack, the cabinet above it, and the top section of the tall pantry are all tied together and weigh approximately one hundred pounds.  We (Debra and I) had to raise those up and mount them up to the ten foot level by hand.  We got them up half way on a scaffold, but the rest of the way was muscle, sweat, and an entire catalog of choice words.  We got it, but just barely, and luckily the damage to the wall was minor and hidden behind the cabinets.  We were lucky neither of us got hurt on this portion.

Building the island brought that geometry nightmare back to life again.  This consisted of four cabinets and several panels and trim sections to tie it all together as a unit.  That, plus we had to build the bar wall and everything had to match and had to line up with everything from the floor lines, to the cabinet spacing.  Things like distance to refrigerator and cabinet doors, floor alignment, and getting the whole mess placed appropriately under the overhead lights and pot rack.  The final stress point was the finality of driving three inch screws down through our new floor to anchor the whole mess.  That step was terrifying.  Counter tops are scheduled to be installed on the 9th.

Wednesday, September 18, 2013

9/18/2013 More of the same

9/18/2013

Good progress on the kitchen, although the process is way scarier than I anticipated.  Our designer has everything measured down to the 1/16th of an inch of how it should all fit together.  However, we are finding that new house construction is rarely true, square, and accurate compared to the blueprints.  This has caused us to work very hard and be a little creative with making everything fit like it's supposed to.  For instance, if we had not purchased commercial leveling hardware to attach to the cabinet bases, I cannot imagine how we would have made everything work.  From the far left side to the far right side of the cabinet run, the floor varies as much as an inch and a quarter from true level!  Remember my comments earlier about self leveling laser levels and purchasing quality equipment?  Well there is no better example than this installation as to what good equipment can do to make a job turn out better.  The most difficult portion of the install is yet to come.  This weekend we are going to start on the wall cabinets on the north wall.  Those cabinets vary in height and depth, so a single ledger board like we used on the west wall will not work.  That plus we have to mount the microwave/vent hood at the same time.  Usually all wall cabinets would have been completed before the bases went in, but we are trying to get the counter top specialist in to measure everything up ASAP so we can get the sink installed when the plumbers come.  It will all work out in the end, but just adds to the complexity now.

This wall will have cabinets from the left corner all the way up to two feet higher than the tall pantry showing on the right.  Besides increasing in height, they will also increase in depth for a three dimensional appearance.
 

Here's a little better picture of the kitchen as a whole.  We will also have to construct the island, which will be located directly below the lighted pot rack showing in the upper center of the picture.  We still have to add the upper crown moulding and lower light trim railings, but that is a low priority for the time being.

 
We also got around to installing the vanity top for the master bath last weekend.  There will be one large mirror on the wall, but not until the plumber gets done messing around in here.  We still have to do the wall tile around the tub, but that can wait until after we are in the house. 
 

Monday, September 2, 2013

9/2/2013 Plenty of stuff going on simultaneously now

9/2/2013
 
Plenty of stuff going on simultaneously now.  Debra and I have successfully mounted our first set of cabinets on our own.  The straight line set of five seemed like a good way to get our feet wet so to speak.  It went reasonably well, considering our amateur status as cabinet installers.  What really shocked us was how far out of straight and level our brand new walls were!  Our technology provided us with absolutely level and true cabinets, but we found to our dismay that the walls are actually out of square by a noticeable margin.  We will have to do a little trimming to mask the one spot that shows.  I'm including the link to the web site we used to learn our cabinet hanging skill.  http://www.ez-level.com/Videosb.html
 
In addition to the cabinets, we also stepped back outside to try and finish the last of the deck.  We want to move in as soon as possible, so we can prep our other house for sale.  Before we will be allowed to occupy though, all safety items have to be installed, i.e. deck railings, stair hand rails, etc.  I did finish most of the deck railings last week, and Debra helped me work on the last portion of the deck floor.  Because of some of the poor quality boards we rejected for use on the deck, we were going to come up short, so I went to our local big box lumber store for more.  To our dismay, we found that the local lumber was fully 1/4 inch thicker than what came with the house.  That may not seem like much, but actually was quite noticeable and did create a trip hazard.  Our solution was to go to the last section of deck on the far side of the house and pull up the last few boards and use them to finish all the transition portions of the deck.  We can then use the new, thicker boards way at the end, and all together.  It will be barely noticeable then, and after drying and shrinking to their final size, be much less obvious.
 
Other items finalized were, tile floor finished in the master bath, and the double vanities installed.  This week we will finish screwing the vanities down, and install the sink top.  The only remaining obstacle to having our plumber back for final hookups will be the sink base cabinet in the kitchen.  Hopefull we can get at that by next weekend.


Our first five cabinets installed. We fastened them all together on the floor to make sure they were true and square, then lifted and mounted them on the wall as a single unit.  A good self leveling laser is a must for this task.  If there is one major lesson to be learned from building our own house, it is that cheap tools make for cheap results.  Every step of the way thus far, whenever a specific tool was needed that I didn't already own, I purchased quality equipment.  The results have spoken for themselves thus far.  I will speak more to this when the house is done and I do my wrap-up to this blog.

This shows about 1/2 our deck so far.  Behind me in the picture is about another 35 feet that juts out to ten feet rather than the eight foot sections you see here.
 

Double bathroom vanities set into place after tile was complete.  Still have to fasten them down and install the one piece vanity top.
 

Thursday, August 22, 2013

8/22/2013 Order (sort of) From Chaos

8/22/2013

Spent the day unpacking cabinets, and clearing access for the movers who are coming with household goods tomorrow.  We're not ready to move in just yet, but the basement and garage will make better storage for household goods than the place we've been paying storage on for the last year.  Tomorrow is going to be wild.  The drywall finisher is coming bright and early to finish fire taping the garage drywall.  The movers are going to be there about 0900 to deliver all my stuff that's been stored ever since I sold my house in Chippewa Falls a year ago July, and our kitchen designer is coming about noon to inspect and help make sense of the truckload of boxes we have taking over most of the house.  I spent a sizeable portion of the day unpacking said boxes and setting all our cabinets out to inventory and inspect.  We plan on starting to hang the wall cabinets this weekend, so am really pumped right now.  Another skill we'll be learning on the fly (with a little help from You Tube).  Debra, with her usual enthusiasm, thinks we can get most of it done this weekend.  Her optimism makes me smile and keeps me trying hard to live up to her expectations.  This is my same loving wife who thought we'd finish drywalling the whole house in a weekend. :)


Thursday, August 15, 2013

8/15/2013 Garage Doors

8/15/2013  Another visual progress item finished today.  Finally after a very lengthy stretch, the stars have aligned in such a way as to provide us with finished and installed garage doors.  The doors were ordered and received clear back in February, but without a concrete floor to set them to, we were never able to have them delivered and installed.  Now, at last we have a fully secured house, and can start staging some items out of paid storage into the garage so we can move them in as we finish rooms inside.

We decided to let the pros take care of this installation.  I would have preferred to do it myself, but can't take the time right now, and we really want this garage closed in and secure finally.  I'll add the openers myself later.

Ta Daaaaa, or some such fanfare as needed. :)  We didn't put any windows in the garage, so the glass high in the doors was a compromise that will allow some natural light while maintaining some security for the contents.  you'd have to stand on a ladder to see in these windows.


Tuesday, August 13, 2013

8/13/2013 Lots of STUFF

8/13/2013

The kitchen cabinets were delivered yesterday.  I find myself saying with increasing frequency....."What have we gotten ourselves into now?"  I was expecting a large quantity of material, but not as many odd containers as we received.  As soon as I'm able to get my hands on a good quality self leveling laser level, we will begin laying out the wall cabinets and preparing to start hanging them.  I've purchased two laser levels and returned same so far.  The first one was a cheaply made Johnson Level and parts of it were already broken.  When I opened the box, lots of little shards of plastic tumbled out.  I returned that one and went out and bought a much nicer Bosch (at 4X the price).  The Bosch self leveling laser  wouldn't actually "level".  On a wall twelve feet wide, it was consistently 5/8" higher on one side.  I thought initially we had a floor problem on that wall, but after some experimenting, it didn't matter where in the house I pointed the laser, it was always 5/8" low on the same side, and something appeared to be loose inside the unit.  So, that one went back to the store too.  I almost purchased a much larger unit (at more than double even the Bosch price), but both boxes in the store had obviously been opened and returned to store stock.  That made me curious enough to go online and do a little research.  I found that the Johnson unit at almost $500 was universally panned and was notoriously inaccurate, according to consumer feedback.  So I'm back to square one, which will most likely result in my ordering one online tonight.  We're anxious to get started on the kitchen, but not until we have the appropriate equipment.  In the mean time I still have the master bathroom and the entry way  to finish tiling, and the deck railings to finish,  so it's not like we will run out of things to do in the near term.

Large boxes are cabinets, and skinny boxes are glass doors, trim, and hardware.


Another view, and to gain some perspective, the tall box on the right is just over seven feet tall.
 

Saturday, August 10, 2013

8-10-2013 Simple things

8-10-2013.

Sometimes you get so wrapped up in big picture things that wear you out and wear you down, that you miss the fun of something simple.  We learned a new skill today, that would probably not impress anyone but us.  We learned how to make stairs.  Not graceful winding "Gone With The Wind" impressive stairs, but just a simple little two step, three rise set of stairs.  We've been using ramps, scrap lumber, and ladders to get in the house since we started, but with the completion of our concrete pour, we could finally make something permanent and SAFE to get inside.  Again, nothing fancy, just lumber left over that we felt was not good enough to be used on the deck.  A little trimming of the rough edges, and voila......stairs.

No more slippery narrow ramps to get in the house.
 

The ramp on the right was how we were getting up on the deck before we had the sidewalk poured.
 

Thursday, August 8, 2013

8/8/2013 More Visual Progress

8/8/2013

If more of the folks working on our house had been like todays crew, this whole process would have been way less stressful.  We hired a new concrete crew after giving up on our previous one ever coming back to finish what they started.  The men from Jaenke Concrete were professional, courteous, and good at what they do.  In two days we went from dirt floor and muddy hillside, to fabulous new patio, a flawless garage floor, and a perfect new sidewalk.  When we have people like this working on the place, I have no qualms about walking away and not having to supervise and worry about what type of work is being done.  So, along that line, I was able to get the shelves and hanging brackets mounted in our walk-in closet, finish grouting the tile in the main bathroom, and start laying out the design of the tile in our master bath, instead of shadowing the guys working on cement.  Although I did take breaks for pictures and to admire the way they were making the house look. :)


Pouring the garage floor at last.


In the space of 2 days, we went from this.....


...to this....


...and ultimately this. 
No more mud spattering all the lower windows every time it rains.  We also have the materials set aside for building a retaining wall on both sides of the patio at a later date.

Another little side job our concrete crew helped us with.  Our well was supposed to be drilled at the back of the clearing you see in the picture, but the well driller showed up on a day we weren't there and drilled it right on the edge of our driveway, where any errant delivery truck or visitor would likely smash it trying to turn around at the top of our driveway.  Their fix was to drop off these four large steel pipes, which our crew set and filled with concrete for us today.  Hopefully this will forestall any potential damage.


The visual illusion is that the sidewalk ramps up to the deck, when in reality, it merely flares out as it gets closer, giving us a nice big base on which to place the stairs (which I plan on building this weekend).  Notice the system we installed to run the downspout under the sidewalk instead of having it flow over.  This will prevent ice and other unpleasantness where we have to walk when the weather gets cold.


The first of the shelves and hanging brackets for our walk-in closet.  After we get settled, I plan on building modules for shoe storage, and other shelving needs.
 

Monday, August 5, 2013

8/5/2013 Milestones

8/5/2013.

I love visual progress.  That feeling of satisfaction you get from completing something both difficult and challenging.  We've had a number of those points on this build so far.  Helping on the crew where the initial shell went up and was weathered in.  Putting up all that sheetrock, with all its angles and shapes.  Painting all that drywall.  And now we can add, "installing all the hardwood flooring in our living areas".  As I mentioned back when we started our drywalling project, if you don't have a partner you enjoy working with, these things aren't possible.  Luckily Debra and I have done well as a team, working off each others strengths and weaknesses.  On the flooring project, while I did almost all the actual knee walking and nailing, she was up there for a significant portion of it, running the miter saw and keeping me supplied with appropriate sections of floor boards and support to take days off of what a solo project would have taken.  The floors turned out beautifully, and we are immensely proud of our efforts.

Our appliances were finally delivered last week (we purchased and had them warehoused almost a year ago in anticipation of building months earlier than we did!), and we were not impressed with our delivery.  In their defense, bringing the largest items in the house would have been challenging, but there was no effort by these two big men to make any attempt.  Since we still don't have actual stairs going in to the house, there was a narrow ramp leading up from the garage to the entry.  If their appliance dolly would not fit, they were not going to "carry" anything.  The choice was to send the appliances back, or leave them on the dirt floor of the garage.  I chose the latter.  Within an hour of their leaving, I had built a ramp over two feet wide and strong enough to drive my car up.  With that and a rented appliance dolly Debra and I completed the job.

The current goal is to finish the tiling so we can have the plumber back to complete all our hookups and finally get running water from other than the one faucet in the basement.  This last weekend I did finish the floor in the main bathroom (still needing grout), and Debra got a good start down in the basement staining our doors.  As I said earlier, "I love visual progress".


The final sliver of floor about to be nailed in this five cornered closet about 10 p.m.


Our new appliances  somewhat unceremoniously left on the dirt floor of our garage.  This picture was after the old ramp was torn out, and before the new one was built.


They look much better in this setting.  Hopefully cabinets will be in before the end of the month.


This is how our master bath vanity arrived......in a large box, completely spray encased in foam.  What a challenge that was to extricate!

The first tile project nearing completion.  We loved the randomness of the earth tone tiles in this selection.  Still needs grout this week.  As with everything else in this house, there were more challenging angles and curves to cut as I went.


Friday, July 19, 2013

Details, Details, Details

7/19/2013

People with anal retentive and/or OCD tendencies should not work on their own house.  I am constantly obsessing over little details that invariably cause any task to take twice as long as it should.  I've spent the last two days laying down the hardwood flooring, and each board has to be inspected and moved about until it looks just perfect.  If a tiny detail shows up on the next row, I'm just as likely to go back and pry up one or two to make it look the way I think it should.  This is all fine and dandy if you have all the time in the world, but we have deadlines to meet, and need to keep moving forward so we can actually live here some day.

First the vapor barrier paper must go down.

Next, several boxes of boards are opened and spread out to make sure patterns stay random and not too many of any size or color wind up in one spot.  We chose reclaimed hickory for our wood.

Next comes the layout.  Random spacing for the different size and color variance boards make or break a good looking wood floor.

Since there are no really "straight" walls on which to anchor our layout, we decided to use the fireplace as our focal point.  The whole house will follow this angle and pattern.

The floor will be continuous throughout, with no breaks between  rooms.

Monday, July 15, 2013

7/15/2013 Another milestone

7/15/2013

The electrician came in today to start his final hookups.  Outlets, lights, fans, etc. are moving along nicely.  It will be terrific now to work at night without dragging extension cords and portable lights around to get things done.  While the electrician was working in the house, I got to work on surfacing the first of the ten foot deck sections.  I did that for as long as I could tolerate the heat on the south side of the house, then I moved back in and finished the afternoon doing paint touch-up work.
Last week the fireplace installation crew came by and finished installing the chimney pipe and capped the top of the chimney race. They also dropped off the rest of the fireplace parts, so as soon as we finish the stone on the wall, we can install the fireplace front and the door.  It's pretty darned hot weather for a fire, but I don't care if it's 100 degrees when we get it all together.....I'm starting a fire in that thing!  Our mantle and hearth are sitting at the store waiting for us to take delivery of those big slabs, but I've been hoping to hold that off until our garage floor has been poured, so we can stage those heavy parts out there out of the way until we are ready to install them.
The hardwood flooring was dropped off Friday.  Now we're just trying our best to get the humidity down below 55% inside for at least 48 hours to acclimate it so we can start nailing it down.  Ah, visible progress.....Gotta love it!

This stack of flooring and two more just like it.

After my recent escapades with ladders, I was only too happy to let the experts climb up there and finish the chimney with no help from me.

Wiring up the Great Room