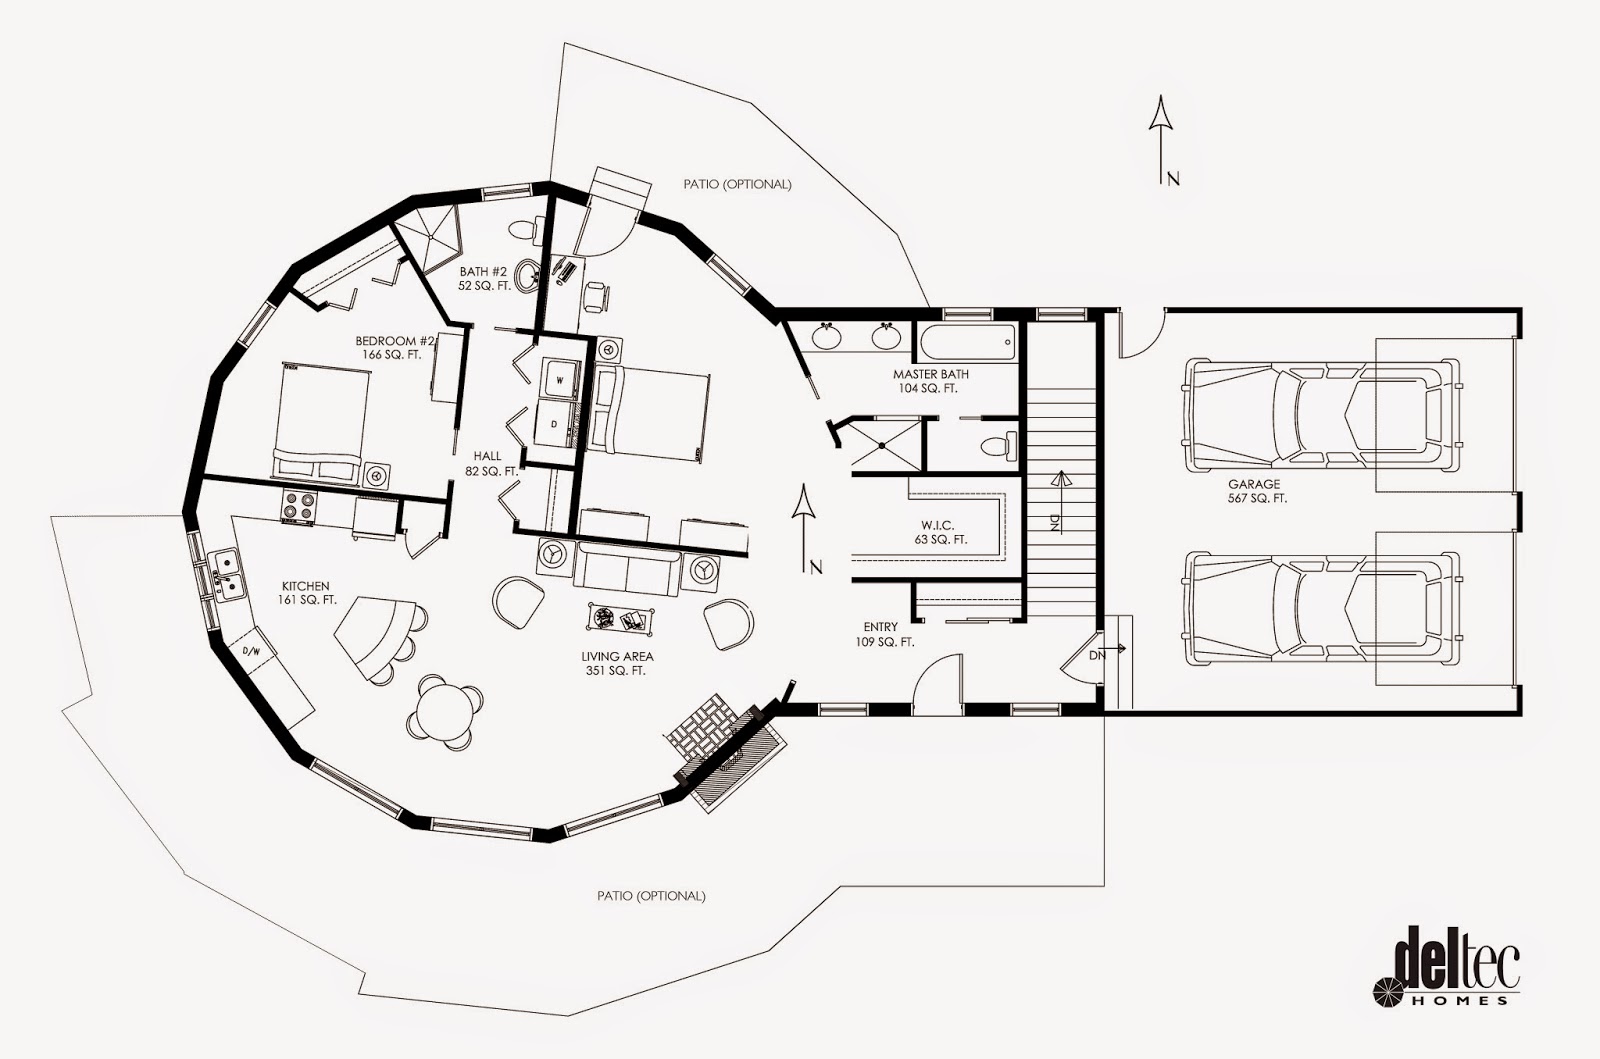
8/9/2015 The Wrap up
We now consider the house done in the sense that anything we do from this point on is elective, and does not have a deadline pushing us to completion. Not that we don't have lots of projects in our future, but none that I believe will keep us up at night. Wow, it has been a long two and a half years, and it is hard to imagine life before the Farm With A View now. I'm going to have to think on this one for a little while and spend a few days compiling this entry because of all the lessons learned in the process (good, bad, and ugly).
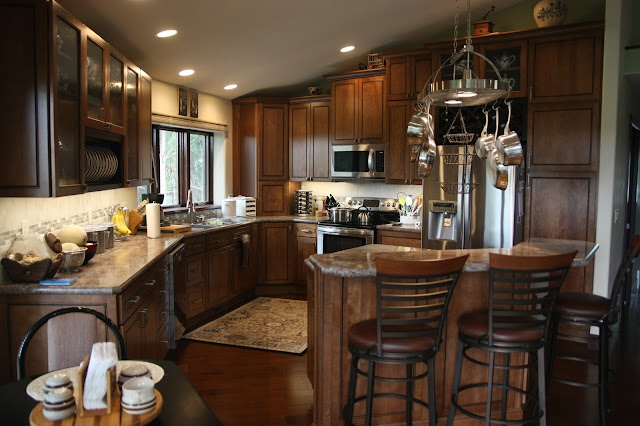 |
| Our kitchen, where the only thing we did not install ourselves was the counter top. I don't include plumbing and electrical, which code required to be done by licensed professionals. We will be forever grateful for this guy (https://www.youtube.com/watch?v=xp6qyUkPyFI) and the leveling hardware we purchased through his web site. We took every single lesson he taught and put it to good use. Thank you Brooks Courtney. |
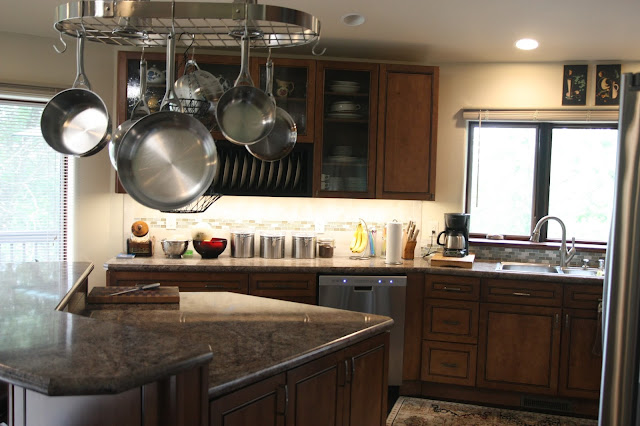 |
| One item we did not install ourselves initially was the lighted pot rack. Unfortunately, neither did our electrician. He incorrectly inserted the anchor stud that holds the whole works in the ceiling, and the entire thing, pots, pans, and all came crashing down on the back of my arm while we were unloading groceries one night. Fortunately, in addition to my arm, the grocery bags absorbed much of the impact, and the only repair we had to make was to the original wiring that got torn loose. Debra and I corrected the mounting stud issue and remounted the rack, which remains stoutly attached to date. |
|
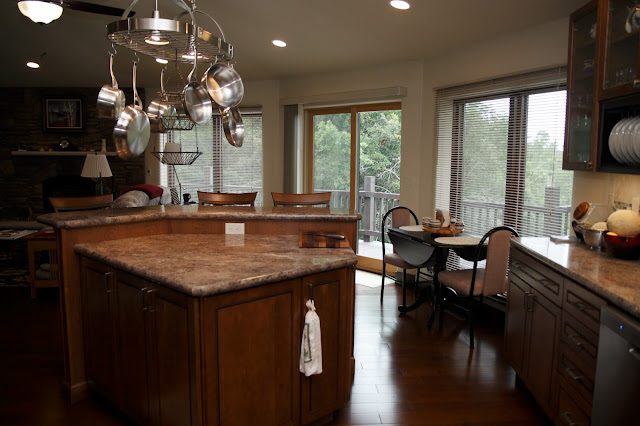 |
| In our old place we were isolated from the rest of the house when working in the kitchen. Now with the open concept of our Deltec, we love the view and the ability to commune with both visitors and nature. |
|
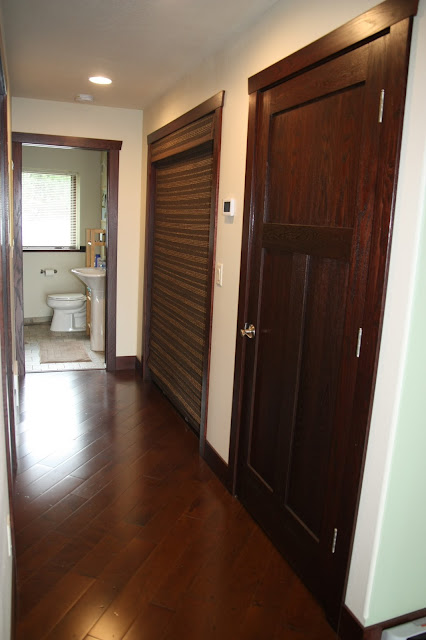 |
| Just off the kitchen is the hallway to the central bath, spare upstairs bedroom, linen closet and laundry area. |
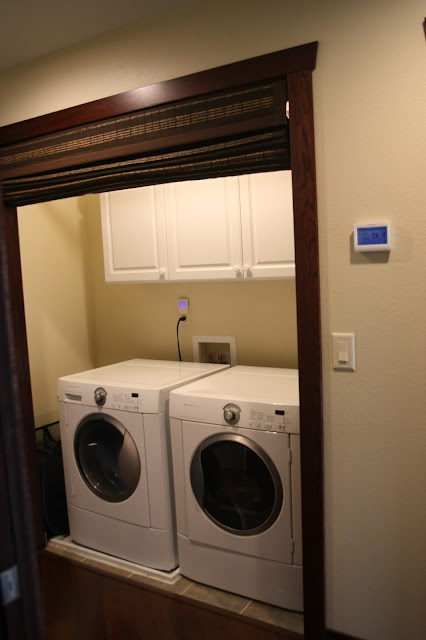 |
| We brought the laundry area to the upstairs central portion of the house for convenience, and enclosed it with a cordless roman shade (see picture above this one). Before we closed in the walls I had the insulators pack the walls with dense pack cellulose insulation which helps greatly in muting any sound from the washer/dryer. I had the white overflow tray (showing below the wash machine) actually plumbed into the drain system of the house. If the wash machine ever breaks or leaks, all the water will simply drain into the septic system instead of down through our hard wood floors. |
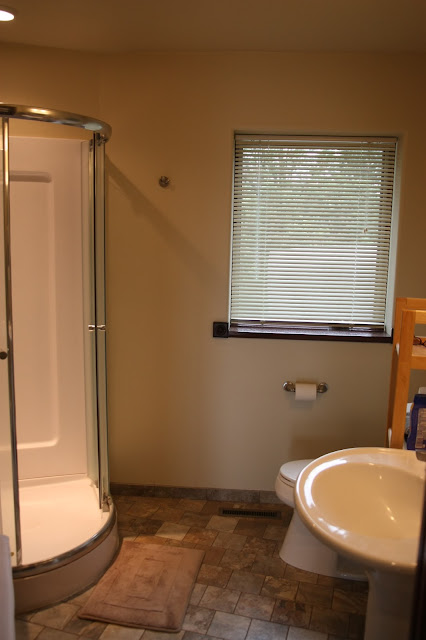 |
| At the end of the hall and just off the upstairs guest bedroom is the main guest bath. In keeping with the circular concept of the Deltec, and to provide a roomier shower, we installed a semi-circular unit, which like most of the rest of the house required more work cutting tile and getting it to work in a non square room. This is a project that Debra and I wound up installing on our own in order to move completion forward. |
 |
| The upstairs guest bedroom, just off the hallway from the kitchen is a very nice size and provides plenty of room. |
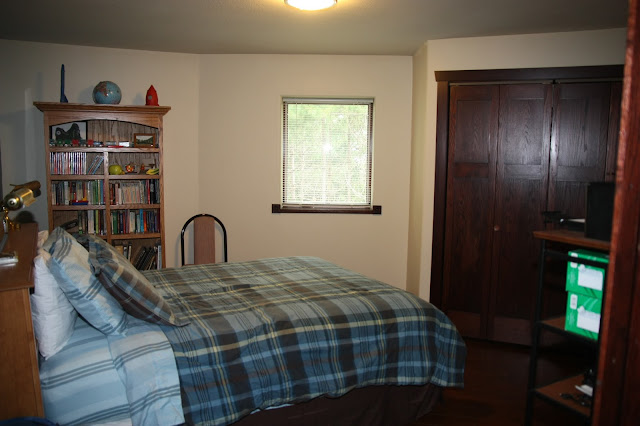 |
| In addition to having plenty of space for guests, there is also room for a small office area to the right (desk, printer, shredder, supplies, etc). Down in the basement directly below is a duplicate version of this bedroom and the guest bath adjacent. Those are currently studded in, but unfinished till a later date. |
 |
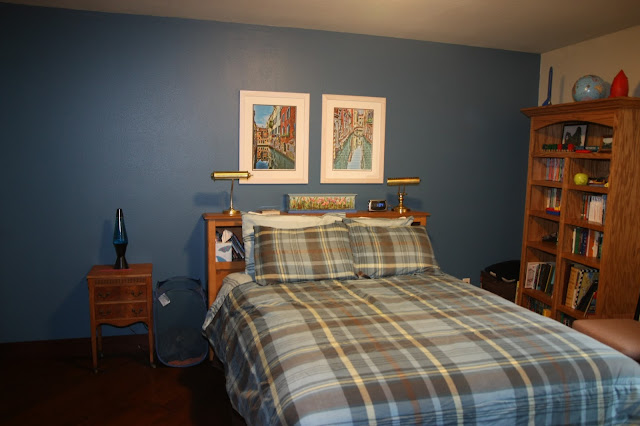
| On the opposite side of the house from the guest bedroom is our master bedroom suite. |
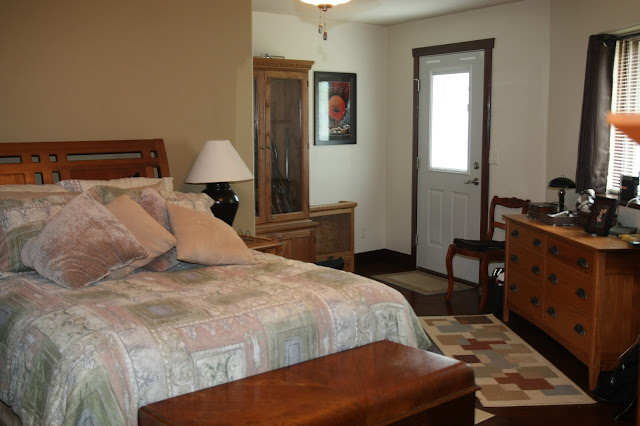 |
| Our room opens out on to a small deck, which in turn steps down to a small private patio in back of the house. This room truly is a sanctuary for us. |
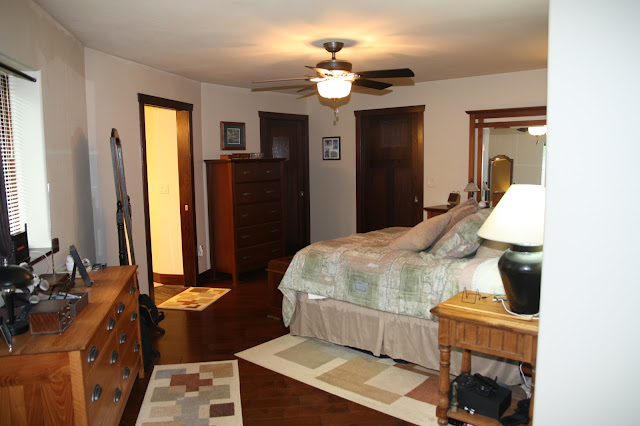 |
| Our respite away from the day to day. |
 |
| The walk-in shower in our master bath, next to installing our kitchen, was the scariest project for me. I built this from scratch. There are no generic shower pans, or wall sections built anywhere that you can just slip in to a "non standard" room like this (it actually has five sides inside because of how it fits in the wall section of our Deltec). The special niche in the wall set between the studs, and the step over threshold, to the floor which is a layer of plywood, concrete, rubber shower membrane, more concrete, and tile, plus several layers of liquid waterproofing membrane on all surfaces, all kept me awake at night for a long time. You Tube to the rescue again. I watched multiple videos multiple times until I got up the confidence to tackle it. Happily all the prep paid off because it turned out perfectly. |
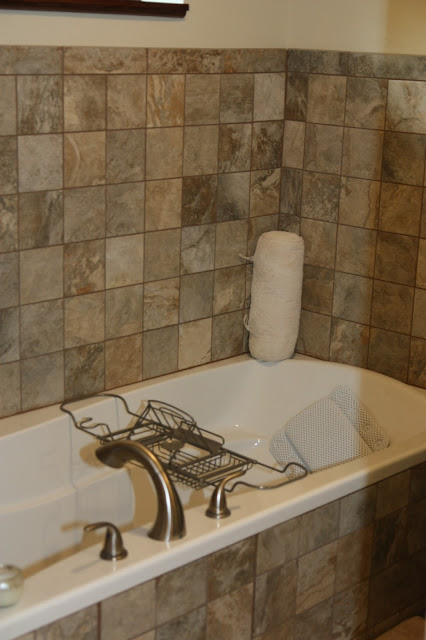 |
| Six foot soaker tub, where the sore muscles from working on the house have been soothed after many a long day. |
 |
| Double vanities and room to move in our master bath. |
 |
| A roomy walk-in closet attached to our master. |
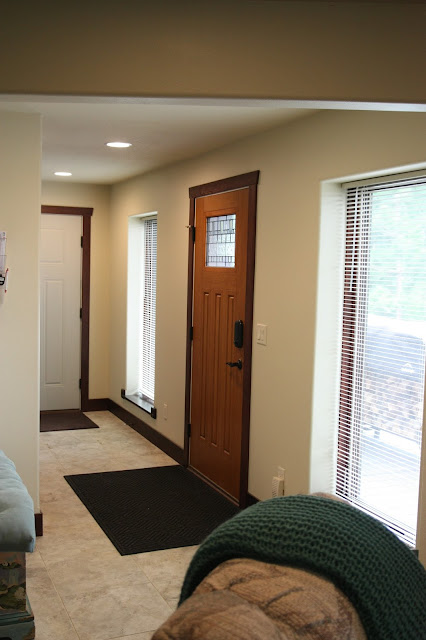 |
| The main entrance, flanked by floor to ceiling crank out windows makes it a welcoming well lit and airy entry to our house. |
 |
| Looking back in to the main house from the entry. There is also a large coat closet just inside the door. |
 |
| The heart of home and hearth. A small detail we added, knowing that this room could be arranged in any of a number of ways are (craftily hidden) two pair of flush mounted electrical outlets in the floor. So no matter where or how the furniture is arranged, there is no need to drape electrical cords across the floor to reach lamps and such. |
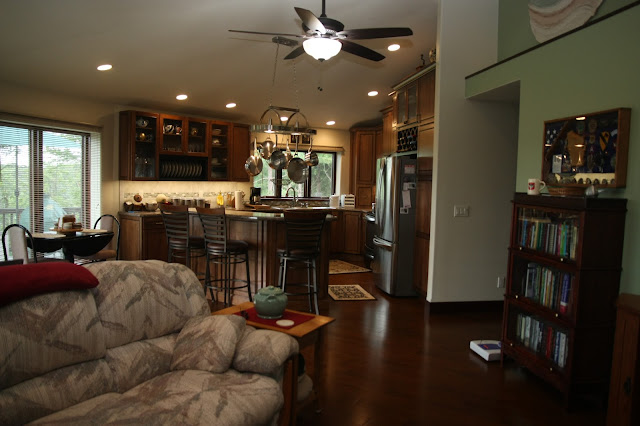 |
| We love the openness of our Deltec design. |
 |
| The shelf we designed above the media wall has an electrical outlet hidden below line of sight with a switch tucked inside the linen closet. Currently we have LED rope lighting to softly illuminate anything on the shelf. For the Christmas holiday, we have festive lights and a little tree that we light up as well. |
 |
| The as yet unfinished, but still useable basement. We have a home office to the immediate left where Debra is able to work from home on certain days. |
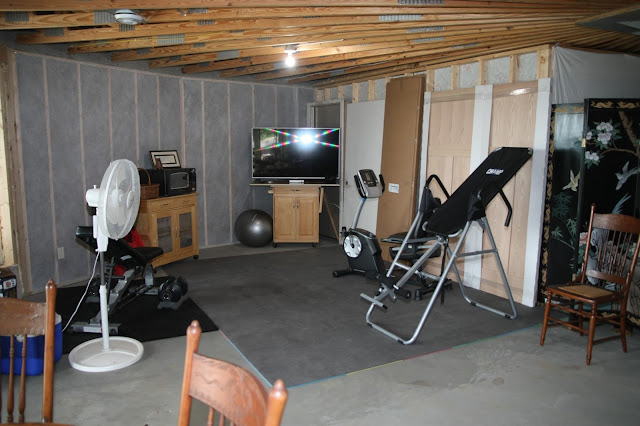 |
| With project deadlines out of the way, we may actually find time to utilize some of our equipment now. |
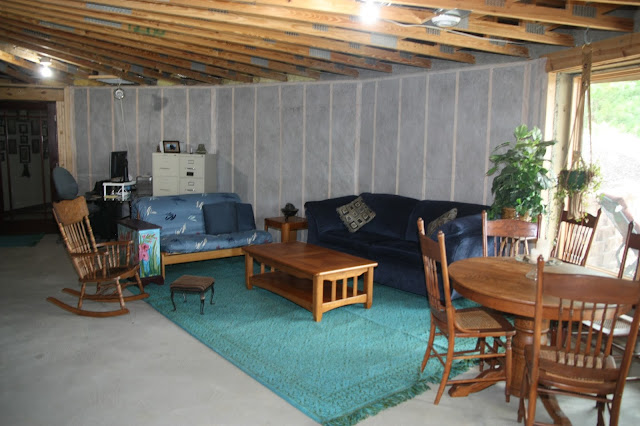 |
| When the weather is too bad to sit outside, we have an area we can hang out down stairs, where tracking in a little dirt won't cause heart palpitations. Some day we will finish this area, but for now we are perfectly content. |
 |
| Sitting areas outside the basement walk-out. |
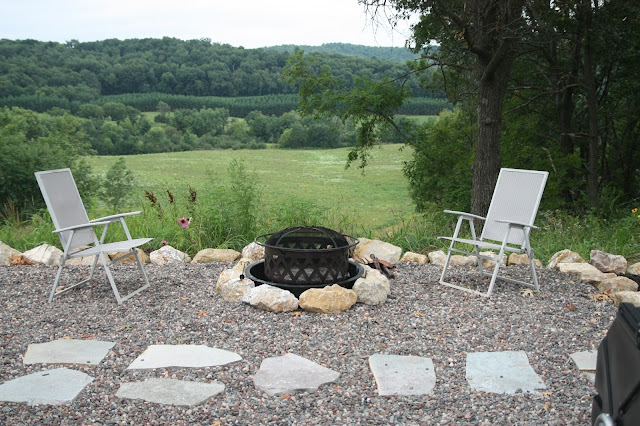 |
| Just add Smores, the view provides the rest. |
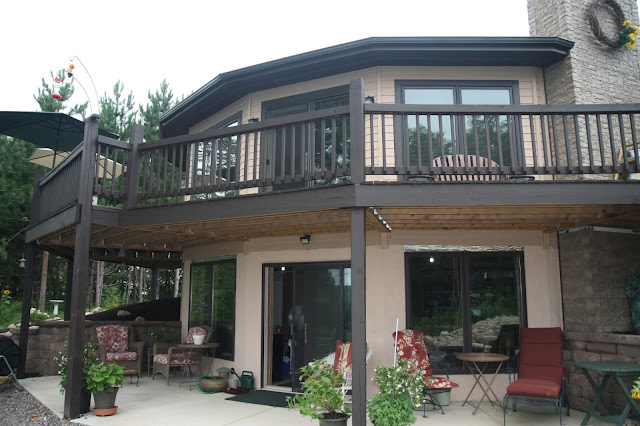 |
| Our southern exposure. You can see now, with the overhang designed by Deltec to be appropriate for our northern latitude, how we get so much passive solar heating in the Winter time. |
 |
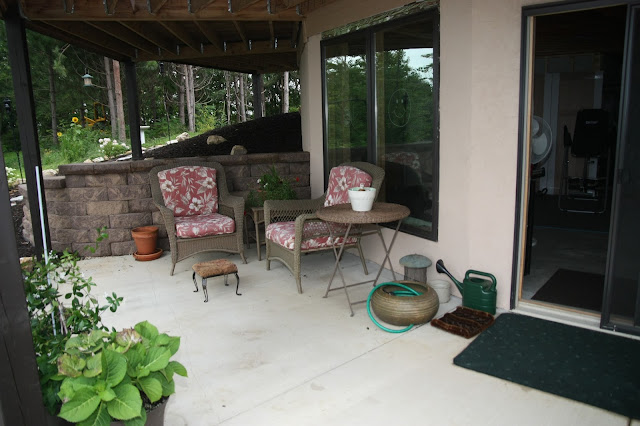
| Our septic tanks were such an eye sore just off the patio, until Debra came up with this design idea. A few treated deck boards and some stout framing resting on top of the concrete tank covers now provides her with some sturdy platforms to display her flowers. When access is needed to the tanks, these just lift off and out of the way. |
 |
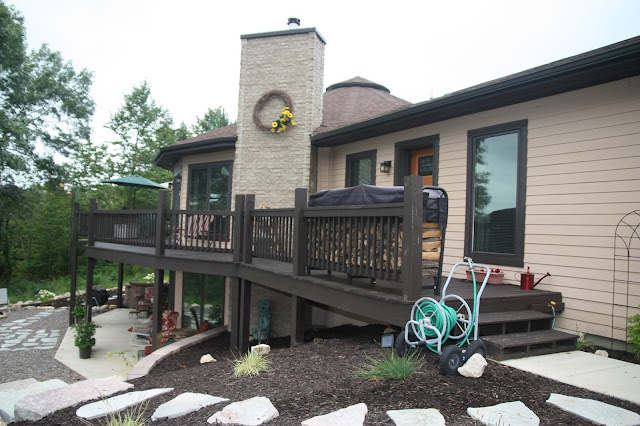
| Upper deck cooking and eating area looking to the West. I have to put in a plug here for the Big Green Egg grill. This is the best charcoal grill and smoker I have ever seen or used, bar none. |
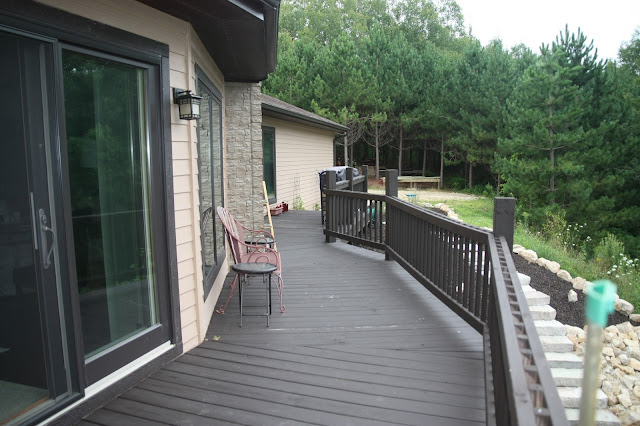 |
| Upper deck looking back to the East. |
 |
| Our final project before closing the book on all the major work we have accomplished on our Deltec. Debra got the idea from a fence she saw at one of the parks in La Crosse. We will be cutting a gate into it later. We'll let that cedar weather naturally, so no maintenance needed. |
 |
| Thank you to those who have been following our progress, trials, and tribulations. It has been a journey, and we appreciate your taking it with us. |
Now for some of the grit and lessons we picked up along the way. I'm going to start with the bad items up front.
First and foremost we would strongly council anyone thinking of taking on a home building project, to take as much time as needed before committing themselves to the process. When shopping for contractors and sub contractors, make certain to carefully vet those people before signing anything. Check through your local Better Business Bureau. Ask questions of local lumber yards and other professionals in your area for recommendations, both for and against any contractors you may be considering. Had we taken the time to do that, this whole process would have turned out drastically different and a whole lot cheaper for us. We made the mistake of rushing into the contractual start of this project because we were about to lose some significant discounts Deltec had offered us up front. To take advantage of those discounts, we had to accept delivery of our home package by a certain date. Looking back now we would have been many thousands of dollars ahead if we had given up those discounts vs the money we lost in the building process.
Another thing we regret is allowing ourselves to be talked into a "time and materials" contract, vs a fixed bid, from someone we were not familiar with and who was not intimately familiar with the vagaries of putting up a Deltec home.
Another thing that cost us is we wish we had gotten a written guarantee of our delivery time and date from Deltec. We love the folks at Deltec dearly, but because our delivery schedule somehow got dropped in the process, we were unable to start on time, and the Deltec engineer we had arranged for could not be here when the house was set. Also the whole kit and kaboodle had to sit in the open wrapped in plastic for weeks until we could get our set crews back online in the middle of a hard Wisconsin winter.
Now, moving on to the good portions of this project. Always end on a high note is a good way to finish.
Other than that slight given to Deltec above, we cannot say enough good things about this company and its people. On the many occasions when we turned to them for help and answers, they were always there. From the initial visit to the factory when we had no idea what we were getting ourselves into, to months and years down the road when we STILL didn't realize what we had gotten ourselves into, we always knew help was a phone call away. The product they provide is second to none in quality. When people look at our pictures, or tour the house and see what the Deltec portion is made of, they are always impressed.
After we had lived in our new area for a time and gotten to know the locals, we discovered a wealth of quality builders and expert craftsman from which we would have benefited immensely during this build had we taken that time before instead of rushing in to save a few dollars.
The one time I did challenge a subcontractor, it turned out to be very good for us. When our HVAC contractor wouldn't deal with us directly, (he only wanted to go through our general contractor and not deal with the homeowner) or answer questions we had, we went with a company
we chose and could not have been happier with the result. Like Deltec, Water Source Heating and Cooling of Eau Claire, WI, was prompt, worked well with us, answered all questions, and walked us through every step of the install as they went. When warranty issues came up later, they were wonderful. This company is quality every step of the way. We wish every contractor we dealt with could have been like this.
Tools and equipment. If you are doing projects yourself, do not cheap out on your equipment. Before we started this I thought I had a pretty good set of wood working tools because I used to have a wood shop setup in my old house. You don't realize how many specialty items become necessary when you start a project like this. The kitchen was a perfect example. A quality self leveling laser was the start, then pony clamps and specialized plastic shims, indoor scaffolding, etc, etc, were all things I never used or thought of before. Specialized nailers, squaring devices and other odds and ends for the hardwood floors. I've tiled before, but had not done masonry (fireplace wall), so we had to add additional items over and above what I owned prior. Because I had never done such extensive tile work, we bought a large sliding table tile saw, and are extremely grateful we did. There are other examples, but you get the idea. Unless you have done professional home building in the past, you are going to have to budget a considerable sum for tools that didn't even occur to you.
Do not skimp on your tool budget! Cheap tools yield cheap results. You will regret that hardware store power tool when it gives out part way through a project, or does not have proper tolerances and allows slop in your work. I don't regret a cent we spent on tools to build this house.
We're grateful for friends and coworkers who had to deal with our incessant pictures and constantly talking about what was happening with and what we were doing to our house. I'm sure we were tedious at times.
I am particularly grateful for a patient spouse and wonderful partner who works so well with me, especially when I'm stressed or impatient with something. Always the calming influence, and knowing just when to needle and push when I thought there was something I or we could not do on our own. She always proved we could, when we put our minds and backs in to it (with a healthy dose of that ever wonderful You Tube).
Would we do it again? Yes, yes we would. It's been a long road, but looking back on all we accomplished in spite of the challenges, makes us immensely proud of our home and the part we played in building it. Here's to our future in our new Deltec home.
Kim and Debra Randall